Are you in love with fringe patio umbrellas as much as I am? All winter I was searching for a fringe umbrella for my patio, partly because I was longing for patio season and partly because fringe umbrellas are the perfect modern twist to an outdoor decor staple. Boy was I surprised at how expensive they were - upwards of $300. If you know me you know I have a hard time paying for something that is excessively marked up because of a trend. So I did what any good DIY design blogger would do and I made it myself. You guys, this DIY fringe patio umbrella is one of my favourite DIYs ever. Not only did it save me tons of money but it looks super cute and adds a beachy vibe to my patio.
We've been pretty busy lately and haven't had time to do any memorable things with the kids (unless you count watching the Raptors). Buying, selling and renovating a house can really bog you down so I decided to do something special for the kids this week - a DIY outdoor movie night! We borrowed a projector from a friend and with the help of Kitchen Stuff Plus and their Summer Nights dinnerware collection I created this enchanting backyard theatre. Kitchen Stuff Plus really has the best value and selection of outdoor furniture and dinnerware to make any outdoor idea you have a reality.
I made the movie screen by simply tying two knots at the top of a king bed sheet and hooking on some bungie cords that were wrapped around a tree. It worked out perfect. This could work anywhere really, you don't need a huge backyard to make it happen (plus you could always just pull your TV outside if that's easier). For added comfort and ambiance I layered a few outdoor rugs, pillows, blankets and hung some outdoor lanterns.
For the snack bar I picked up a few southwest melamine plates and platters from Kitchen stuff plus, (so on-trend, affordable and durable!) I decided on a semi-camping, semi-movie menu; popcorn, s'mores, cookies, milk, you get the idea (and I threw in some fruit for good measure). The kids loved it.
One of my favourite things were these old fashion milk glasses and metal straws and my boys loved them too (although they did get spilled a few times lol). We eventually used these acacia wood serving trays to act as tables while the movie was playing.
Special thanks to Kitchen Stuff Plus for helping me set the scene for this magical moment, my boys loved this DIY outdoor movie night. I have a feeling we'll be doing it again real soon. PS - we watched Minions but I couldn't get it to show up in the photos lol.
This post is in partnership with Kitchen Stuff Plus. All expressed opinions are my own.
14:39:00
No comments
Whether it’s a hanging planter filled with faux geranium foliage, or succulent centerpieces on your patio table, decorating with artificial plants outdoors is a big trend this season. I jumped on this trend during my One Room Challenge reveal last week, all the plants on my patio are artificial - can you believe it? Today, in partnership with Décors Veronneau, I’m excited to share a few ways you can incorporate faux plants into your outdoor space.
Consider using a privacy fence panels, covered in artificial foliage to create the perfect privacy screen! These trellises can be installed right on your fence, or even on an outdoor banister. Since they’re expandable, you can adjust their size to your needs. Growing your own living wall or privacy ivy could prove to be challenging but this fence panel is the perfect alternative to get the look without the maintenance. In my space, I used this fence panel to add texture and greenery to the walls of my patio and adorned it with a few empty frames.
Hanging arrangements are another great way to incorporate artificial greenery into your outdoor space. Often real hanging plants can be finicky and can get scorched by the sun. Faux hanging arrangements are the perfect alternative, all the beauty without the stress. Pro tip: weave some twinkle lights through the artificial hanging plants to create a cozy, romantic atmosphere.
Lastly, using faux arrangements on your table is a great way to have greenery outside without the insects that may be attracted to the real thing. Perhaps a succulent centerpiece or something more colourful, the possibilities are endless. And while real outdoor plants usually require a lot of nurturing, artificial plants only need a bit of sunblock spray to keep them looking like new all season long.
Adding the finishing touches to your outdoor decor with outdoor artificial plants is sure to be a hit this season and for years to come!
This post is in partnership with Décors Véronneau. All expressed opinions are my own.
00:34:00
No comments
Reveal day of the One Room Challenge Spring 2019 is finally here. My patio makeover is complete and I love it. It has just enough cool to make it fun and just enough cozy to make it comfortable. The weather during the last 6 weeks of the ORC hasn't really been on my side, let's say there have been more spring showers than flowers. In any case, I got the space done but there were a few things that had to be put on the back burner (e.g. painting the cement pad). If you like this space be sure to check out the featured designers rooms reveals and the guest participants makeovers, there is so much inspiration!
If this is your first time hearing about it, the One Room Challenge is a design event that takes place twice a year (Spring and Fall), where designers have six weeks to makeover one room in their home and blog about it along the way. I have participated in the One Room Challenge four times, one time as a featured designer and three times as a guest participant.
So let's take a look at what this space looked like prior to this makeover.
While this makeover was far less work than some of the other makeovers I've done in the past, it was all I could manage right now because we are renovating a new house and selling our current house. Here was the original plan.
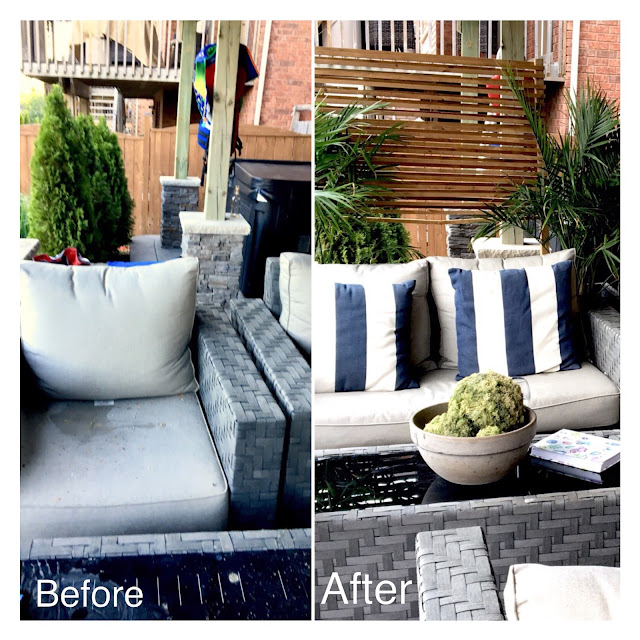
You can look back on the progress of this space with Week 1 (The plan), Week 2 (Top 5 Outdoor Trends) and Week 3 (Thrifting Tips). In a nutshell, we painted the fence and posts, thrifted a few pieces of wall art and picked up some great artificial plants from my sponsor Decors Veronneau. They have great hanging arrangements and expandable privacy fence panels that are a great way to add greenery and privacy to a patio. Another item that really makes the space shine is the Sol Daybed from Article from their Boho Westcoast outdoor line of furniture. I can't wait for the weather to get better so I can use this space more often.
Special thanks to the event sponsor Better Homes and Gardens and to my brand sponsors Article and Decors Veronneau and to Linda of Calling It Home for creating this event.
If this is your first time hearing about it, the One Room Challenge is a design event that takes place twice a year (Spring and Fall), where designers have six weeks to makeover one room in their home and blog about it along the way. I have participated in the One Room Challenge four times, one time as a featured designer and three times as a guest participant.
So let's take a look at what this space looked like prior to this makeover.
While this makeover was far less work than some of the other makeovers I've done in the past, it was all I could manage right now because we are renovating a new house and selling our current house. Here was the original plan.
Special thanks to the event sponsor Better Homes and Gardens and to my brand sponsors Article and Decors Veronneau and to Linda of Calling It Home for creating this event.
20:27:00
4
comments
I was at a bit of a standstill during Week 2 of the One Room Challenge (due to weather, such is life when you select your patio to makeover). So with that I've decided to share my Top 5 Outdoor Trends of 2019 instead of a full room update. My trend report was recently quoted in a Toronto Sun article titled "Embracing Outdoor Living" so I thought I'd share the full list here. Here we go.
Top 5 Trends to Bring your Backyard to Life
1. Light up the Night
Outdoor lamps and hanging pendants will continue to be a big trend in outdoor living in 2019. As with our interiors, we will layer our lighting outdoors to have various options for different times of day or for our different moods. Perhaps a drum shade over head while eating dinner or lamps flanking the outdoor sofa while curled up with a glass of wine or maybe pendants hanging from the trees for a romantic retreat. However you spend time outdoors lighting will be an essential part of it.
2. Retro Furniture with a Textured Twist
Minimalistic and uniquely designed wireframe furniture from days gone by will make a comeback in 2019 (like the vintage Woodward wrought iron set below). We will see it revived on it’s own, styled with a contrasting material such as fur or sheepskin or intricately woven with fabric between the rungs. A skinny metal side table or metal plant stand would be an easy way to incorporate this trend into your space.
3. Living Walls
Vertical gardens of uniquely patterned moss or climbing ivy in a deliberate criss cross pattern are a few examples of how living walls will make a big splash in 2019. Watching them develop throughout the season will be an exciting focal point and conversation piece in any outdoor living space. Plus, there are artificial versions available for those who want the look without the upkeep.
4. Painted Patio Tile
As is often the case, great indoor trends often makes their way outdoors a year or two later. The same is true for the trend of cement design tiles. Colourful design tiles that have exploded in interiors recently will make their way onto our patios this season adding interest and pops of colour. A great way to get this look for less is to try a faux painted tile on your existing patio stones or cement pad.
5. Hanging Daybed Swing
The porch swing all grown up. The hanging daybed swing is probably the most comfortable outdoor trend of 2019. Perfect for reading, cuddling on a summer afternoon or taking an afternoon nap. We’ll be seeing these suspended beauties with loads of pillows and blankets. Honestly with a piece like this in your outdoor living room you may never come inside.
Stay tuned for Week 3 when I will be tackling my fence and some other DIY projects.
Be sure to follow me on Instagram to keep up to date on my daily progress.
Top 5 Trends to Bring your Backyard to Life
1. Light up the Night
Outdoor lamps and hanging pendants will continue to be a big trend in outdoor living in 2019. As with our interiors, we will layer our lighting outdoors to have various options for different times of day or for our different moods. Perhaps a drum shade over head while eating dinner or lamps flanking the outdoor sofa while curled up with a glass of wine or maybe pendants hanging from the trees for a romantic retreat. However you spend time outdoors lighting will be an essential part of it.
Photo Credit: Love Create Celebrate
2. Retro Furniture with a Textured Twist
Minimalistic and uniquely designed wireframe furniture from days gone by will make a comeback in 2019 (like the vintage Woodward wrought iron set below). We will see it revived on it’s own, styled with a contrasting material such as fur or sheepskin or intricately woven with fabric between the rungs. A skinny metal side table or metal plant stand would be an easy way to incorporate this trend into your space.
3. Living Walls
Vertical gardens of uniquely patterned moss or climbing ivy in a deliberate criss cross pattern are a few examples of how living walls will make a big splash in 2019. Watching them develop throughout the season will be an exciting focal point and conversation piece in any outdoor living space. Plus, there are artificial versions available for those who want the look without the upkeep.
Photo Credit: Decors Veronneau
4. Painted Patio Tile
As is often the case, great indoor trends often makes their way outdoors a year or two later. The same is true for the trend of cement design tiles. Colourful design tiles that have exploded in interiors recently will make their way onto our patios this season adding interest and pops of colour. A great way to get this look for less is to try a faux painted tile on your existing patio stones or cement pad.
Photo Credit: Style by Emily Henderson
5. Hanging Daybed Swing
The porch swing all grown up. The hanging daybed swing is probably the most comfortable outdoor trend of 2019. Perfect for reading, cuddling on a summer afternoon or taking an afternoon nap. We’ll be seeing these suspended beauties with loads of pillows and blankets. Honestly with a piece like this in your outdoor living room you may never come inside.
Photo Credit: Plank and Pillow
Stay tuned for Week 3 when I will be tackling my fence and some other DIY projects.
Be sure to follow me on Instagram to keep up to date on my daily progress.
20:28:00
No comments
The weather is getting warmer and the birds are chirping in the morning, does it get any better? I've been eager to get outside and start setting up my patio. Today, as part of the Modern Handmade Home Series, myself and three other bloggers are sharing some patio ideas in partnership with Article. Honestly if you haven't shopped the furniture at Article you are missing out. Their furniture and home accessories are the perfect mix of contemporary and mid-century modern. Plus they just introduced three new outdoor collections; Garden Scandi, Industrial Pop and Boho Westcoast (which immediately spoke to me). Below you will find some Boho Patio ideas that can turn any plain patio into a relaxing modern grotto.
1. Add a Statement Piece
A showstopping piece like the Sol Daybed from Article is the perfect focal point for any boho space. With an authentic rattan base and soft poly-fill cushion it works on a patio or surrounded by plants in a sitting room.
2. Layer Your Textiles
Adding layers of rugs, throws, drapes and curtains can add depth to a space and create a sense of comfort and relaxation.
3. Add Lush Plants (Real or Artificial)
Yes I said it. You can use artificial plants outside. I know this seems counter intuitive but if your patio is too hot or too shaded to grow plants then an outdoor artificial plant is the way to go (just make sure you spray them with an outdoor protector). Plants are a must on a boho patio.
4. Bump Up The Pillow Quota
My husband wouldn't agree with me on this one because he strongly dislikes throw pillows but I say the more pillows the better (maybe I should have put that on my online profile lol). Seriously though, pillows put the "oh" in "boho" (in a PG sense). It just wouldn't be a boho patio without them.
5. Incorporate Rattan or Wicker
Adding rattan or wicker immediate heightens the rustic indo charm to a space. The Sol Daybed from Article has an authentic rattan base that is sturdy without being too heavy (which is key if you want to move it indoors for the winter). I think I'm just looking for opportunities to talk about this Daybed - it's awesome.
 Be sure to check out the other blogger's in the Modern Handmade Home Series to see how they've incorporated some great pieces from Article into their outdoor spaces. Lindi from Love, Create, Celebrate shares some tips for picking patio furniture, Thalita from The Learner Observer has a great front porch makeover and Colleen from Lemon Thistle shows us a modern brick patio.
1. Add a Statement Piece
A showstopping piece like the Sol Daybed from Article is the perfect focal point for any boho space. With an authentic rattan base and soft poly-fill cushion it works on a patio or surrounded by plants in a sitting room.
2. Layer Your Textiles
Adding layers of rugs, throws, drapes and curtains can add depth to a space and create a sense of comfort and relaxation.
3. Add Lush Plants (Real or Artificial)
Yes I said it. You can use artificial plants outside. I know this seems counter intuitive but if your patio is too hot or too shaded to grow plants then an outdoor artificial plant is the way to go (just make sure you spray them with an outdoor protector). Plants are a must on a boho patio.
4. Bump Up The Pillow Quota
My husband wouldn't agree with me on this one because he strongly dislikes throw pillows but I say the more pillows the better (maybe I should have put that on my online profile lol). Seriously though, pillows put the "oh" in "boho" (in a PG sense). It just wouldn't be a boho patio without them.
5. Incorporate Rattan or Wicker
Adding rattan or wicker immediate heightens the rustic indo charm to a space. The Sol Daybed from Article has an authentic rattan base that is sturdy without being too heavy (which is key if you want to move it indoors for the winter). I think I'm just looking for opportunities to talk about this Daybed - it's awesome.
 Be sure to check out the other blogger's in the Modern Handmade Home Series to see how they've incorporated some great pieces from Article into their outdoor spaces. Lindi from Love, Create, Celebrate shares some tips for picking patio furniture, Thalita from The Learner Observer has a great front porch makeover and Colleen from Lemon Thistle shows us a modern brick patio.
This post is in partnership with Article. All expressed opinions are my own.
08:59:00
No comments
I almost missed the window for the 2019 Spring One Room Challenge because we just bought a house and I wasn't sure I'd be able to participate. However I realized that our current home needs some work before we can put it on the market so the ORC is the perfect motivation to make me do it.
If this is your first time hearing about it, the One Room Challenge is a design event that takes place twice a year (Spring and Fall), where designers have six weeks to makeover one room in their home and blog about it along the way. I have participated in the One Room Challenge four times, one time as a featured designer and three times as a guest participant.
Previous One Room Challenge Reveals:
The Room: My Patio
I have decided to take-on my patio. This is going to be a mini makeover as I don't plan on doing any major construction or demo. Just some fun decorating and a few creative DIYs. As background, my current house some awkward outdoor spaces; first we have a side yard instead of a backyard and second, on the opposite side of the house is an odd little covered patio (the space I have selected for this ORC). Since we don't have a traditional backyard it is essential this little patio oozes with charm and functionality so our potential buyers will see it as a bonus space rather than a consolation prize.
Before Photos
The Plan: A Boho Retreat
I'd like to carry the vibe of the inside of the house outside (watch this House and Home Video for a flavour of the inside space) and create a relaxing boho retreat. I plan to do this by adding some rattan furniture both old and new (perhaps some thrift store finds), tons of plants, pillows and rugs. From a DIY perspective I plan to paint the fence, update an old planter and I may even paint the concrete floor (tbd).
What do you think of the plan? I'm super excited and can't wait to get started.
Special thanks to the event sponsor Better Homes and Gardens and to my brand sponsors Article and Decors Veronneau and to Linda of Calling It Home for creating this event.
If this is your first time hearing about it, the One Room Challenge is a design event that takes place twice a year (Spring and Fall), where designers have six weeks to makeover one room in their home and blog about it along the way. I have participated in the One Room Challenge four times, one time as a featured designer and three times as a guest participant.
Previous One Room Challenge Reveals:
The Room: My Patio
I have decided to take-on my patio. This is going to be a mini makeover as I don't plan on doing any major construction or demo. Just some fun decorating and a few creative DIYs. As background, my current house some awkward outdoor spaces; first we have a side yard instead of a backyard and second, on the opposite side of the house is an odd little covered patio (the space I have selected for this ORC). Since we don't have a traditional backyard it is essential this little patio oozes with charm and functionality so our potential buyers will see it as a bonus space rather than a consolation prize.
Before Photos
The Plan: A Boho Retreat
I'd like to carry the vibe of the inside of the house outside (watch this House and Home Video for a flavour of the inside space) and create a relaxing boho retreat. I plan to do this by adding some rattan furniture both old and new (perhaps some thrift store finds), tons of plants, pillows and rugs. From a DIY perspective I plan to paint the fence, update an old planter and I may even paint the concrete floor (tbd).
Special thanks to the event sponsor Better Homes and Gardens and to my brand sponsors Article and Decors Veronneau and to Linda of Calling It Home for creating this event.
21:24:00
2
comments
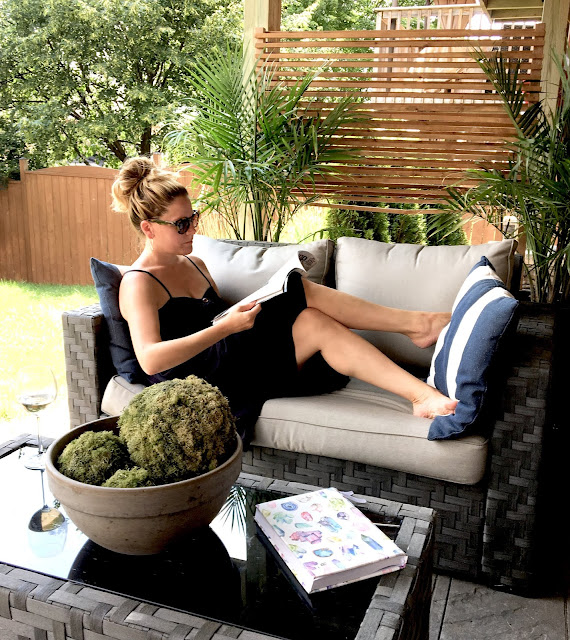
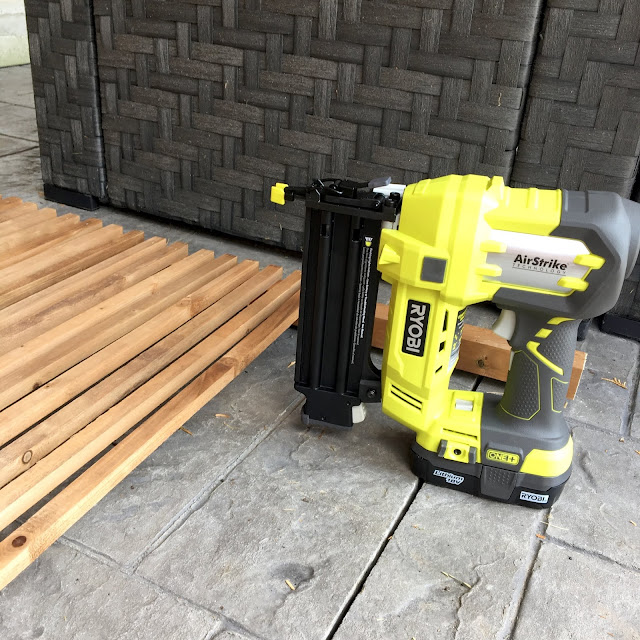
Our house has a walk-out basement which is a really nice feature but our neighbours are super close so we struggle a bit with privacy. My husband and I discussed some privacy screen solutions. We wanted to build something that hid us from the neighbours but still let the sunlight in (which was a challenge). My husband had this great idea to create a DIY outdoor privacy screen that was semi-private and freestanding. With a little help from RYOBI , this month's partner in the Modern Handmade Home series, and the RYOBI 18-Volt ONE+ AirStrike Brad Nailer from The Home Depot we were able to get this job done in under an hour for under $50.
The RYOBI 18-Volt ONE+ AirStrike Brad Nailer is my new best friend - if I can ever get it away from my husband. It drives up to 1700 nails per charge without a bulky compressor or clunky cord. Honestly, I don't know why I didn't purchase tool sooner, it takes the easy jobs and makes them so much easier.
If you caught my Instastories you may have seen my youngest and I picking up all the supplies at The Home Depot. We used the following to create this DIY outdoor privacy screen; two 2x2's, approximately 40 pieces of treated wood nailing strips, 1" nails, 2 pots and plaster of paris.
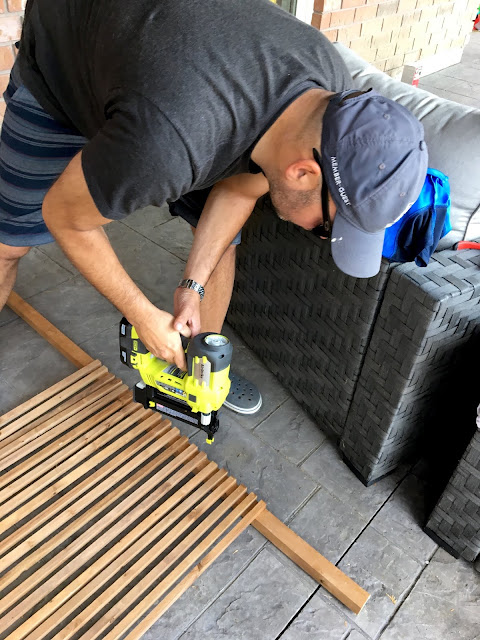
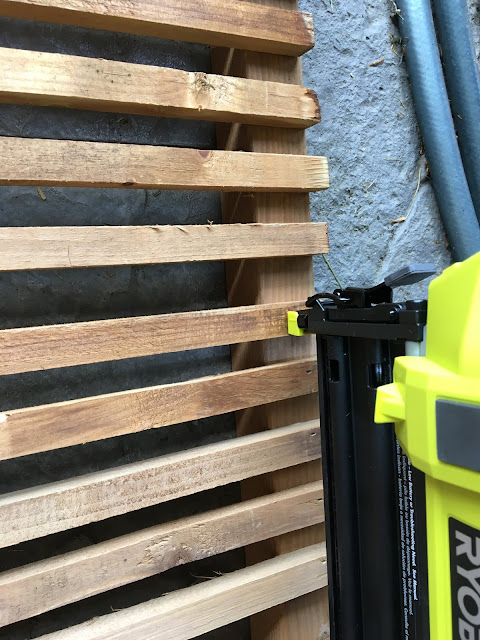
We started by laying out the wood nailing strips on the 2 x 2's. I'm not really sure what wood nailing strips are usually used for maybe to hold up tomato plants or something but they worked really well for this project and they're pressure treated to boot. My husband nailed each piece onto the 2 x 2's (note, we had to cut down the 2 x 2's by about a foot).
Then we flipped it over and repeated the same steps on the other side, filling the spaces with the wood strips this time.
Then we mixed up our plaster of paris according to the directions on the box, poured it into our two pots and stuck the 2x2 posts inside. We let it set over night before we moved it.
That's it! We love the way it turned out and we love that we can move it around our patio as needed.
Be sure to check out the other ladies participating in the Modern Handmade Home series for 5 easy weekend home projects with RYOBI. Colleen from Lemon Thistle shows us how to create a beautiful rock address sign. Thalita from The Learner Observer creates a lovely recipe book stand, Lindi from Love Create Celebrate makes a custom framed mirror and Gemma from the Sweetest Digs show us how to build an awesome raised garden bed.
11:51:00
No comments


