facebook twitter pinterest instagram
  • Home
  • About
  • DIY
    • Diy home decor
    • diy events
      • Birthdays
      • baby bridal shower
      • weddings
    • Diy holidays
      • Christmas
      • Halloween
      • new years
      • Thanksgiving
      • Valentine Day
    • Diy Kids
  • Home Decor
    • before And after
    • Diy home decor
    • Decor tips
    • High-low
    • home tour
    • Trends
    • One room challenge
  • By Rooms
    • Bathroom
    • Dining room
    • outdoor
    • Kids room
    • kitchen
    • laundry
    • living room
    • Office
    • Bedroom
  • Life
    • Entertaining
    • Family
    • Fashion
    • recipe
    • travel
    • Gift Guide
    • Spotlight
  • Shop
    • weekly faves
    • Reviews
    • Free printable
  • Design Studio

Harlow & Thistle

Yes, it's true Halloween is barely on our heels and I'm already talking Christmas. I can't help it, I'm super excited! This season I've partnered with some of Canada's best DIY bloggers for a fun series called Modern Holiday Home where we each share a fun holiday project each week for five weeks.

This week, we're partnering with Therm-O-Web to take on some projects with Deco Foil! You can find all of our projects linked at the bottom of this post AND we're partnering on a sweet Deco Foil Giveaway so be sure to enter.

diy-christmas-tote-gold-foil-thermoweb-harlow-and-thistle-1


DIY Gold Foil Christmas Tote

In thinking about my project I knew I wanted to make a DIY Christmas gift. I found this awesome felt tote at the dollar store and I thought it would make the perfect Christmas bag or gift bag. I used Therm-O-Web gold Deco Foils and their liquid adhesive to create this unique Christmas gift.

diy-christmas-tote-gold-foil-thermoweb-harlow-and-thistle-2

Step One: Pick a design (either free hand or use a stencil). I free handed this design and I love it. The adhesive comes out of the tub evenly so I didn't have to worry about clumps.
Step Two: Let it dry until the adhesive is transparent (seriously, waiting was the hardest part of this project). If you make your lines thick you will need to wait longer.
Step Three: Place the Deco Foil colour side up and press it down with your finger or nail. Pull off the foil and repeat the beginning of this step if you missed a spot. It's that easy.

diy-christmas-tote-gold-foil-thermoweb-harlow-and-thistle-3

diy-christmas-tote-gold-foil-thermoweb-harlow-and-thistle-5

This was my first time working with Therm-O-Web and I have fallen in love with their products. Hands down Therm-O-Web Deco Foils are the best way to personalize any holiday gift in a professional way.

diy-christmas-tote-gold-foil-thermoweb-harlow-and-thistle-7

diy-christmas-tote-gold-foil-thermoweb-harlow-and-thistle-9

diy-christmas-tote-gold-foil-thermoweb-harlow-and-thistle-10

diy-christmas-tote-gold-foil-thermoweb-harlow-and-thistle-11

diy-christmas-tote-gold-foil-thermoweb-harlow-and-thistle-12

Be sure to check out the other bloggers in the Modern Holiday Home series; Colleen from Lemon Thistle made some beautiful holiday gift tags, Thalita from The Learner Observer made some gorgeous metallic foil napkins, Lindi from Love Create Celebrate create an amazing Noel sign and Gemma from The Sweetest Digs made a lovely gold foil pillow.


Interested in trying it yourself? Click below to enter to win a stash of Therm-O-Web Deco Foils.

Enter the Therm-O-Web Decor Foil Giveaway!
This post is in collaboration with Therm-O-Web. All expressed opinions are my own.
09:00:00 No comments
If you caught my favourite finds this week you may have guessed that I would DIY the "Do Not Disturb" floppy hat (I hope you didn't guess the chair but if you did I'd be totally flattered).

This monogram sun hat, inspired by Eugenia Kim's Sunny Hat, is a fun trend that's sure to be a summer staple this year. These floppy hats with writing have tons of personality each with their own cute saying. I wanted to write something super cheeky but in the end I decided to go with the traditional "Do Not Disturb" floppy hat.


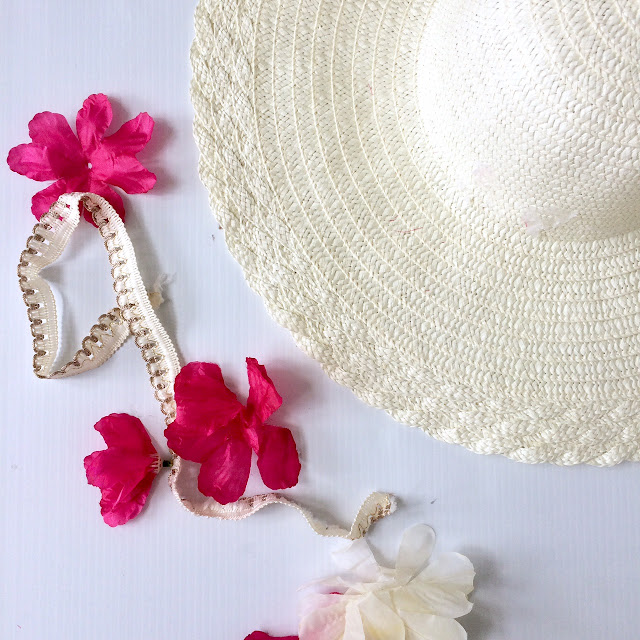
Would you believe me if I said I made this straw hat for $4? That's right I got everything from the dollar store. Here are the things I used to make this beauty.

DIY Do Not Disturb Floppy Hat 2

I carefully ripped off the flowers and ribbon from the hat.

DIY Do Not Disturb Floppy Hat 3

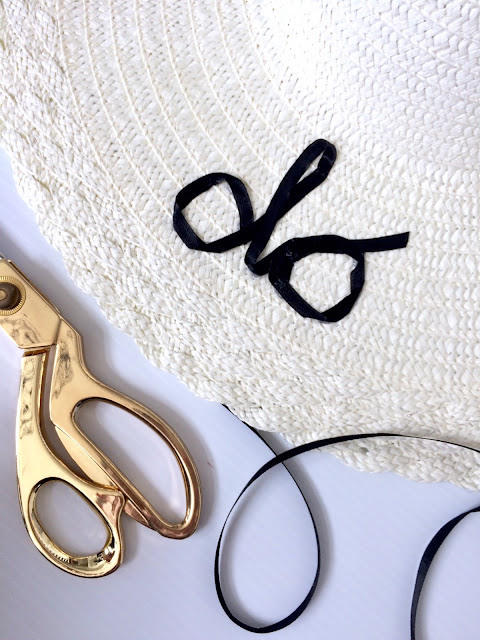
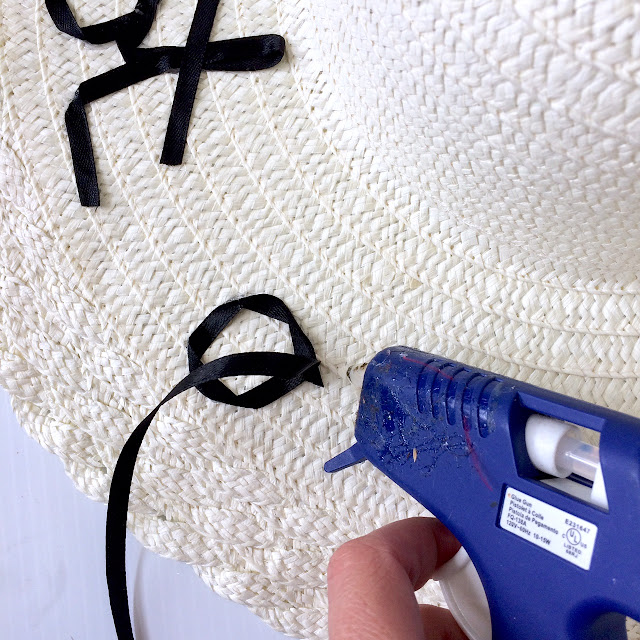
I used a pencil to layout the saying exactly where I wanted the ribbon to go. Then I used hot glue to adhere the ribbon along the pencil writing template. I'm not going to lie this was a bit tricky and I burned myself more than once. The key thing to remember is that the glue doesn't dry as fast as you think it does.

DIY Do Not Disturb Floppy Hat 4

DIY Do Not Disturb Floppy Hat 5

DIY Do Not Disturb Floppy Hat 7

DIY Do Not Disturb Floppy Hat 8

DIY Do Not Disturb Floppy Hat 9


And if you don't feel like making one you can get your own floppy hat with writing here or on Etsy.

DIY Floppy Hat with writing

DIY Floppy Hat with writing

When I wore this to the beach my son said "Mommy you look nice" which is always a good thing.
Until next week : )
13:05:00 No comments
If you're a mom you know how tough the time change can be on the littles. We changed our clocks back last weekend and my kids are still adjusting (seriously, somebody please tell me when toddlers start sleeping in lol). Luckily I have this beautiful timepiece to look at in the wee hours of the morning. Let me introduce you to JORD Wood watches. These unique watches are elegant yet funky, cute yet serious, light yet strong.
I feel so privileged to offer my visitors the chance to win a $75 JORD e-gift code. Plus, everyone who enters will instantly receive a $25 e-gift code to use on the JORD website.
Click here to enter The contest will close 12/18/2016 at 11:59pm.
JORD Wood Watches with Harlow and Thistle

Look at this cool packaging!

JORD Wood Watches with Harlow and Thistle

I love anything rustic or made of wood so this watch is right up my alley. I love pairing it with chunky metallic jewellery for a bit of that opposite juxtaposition. If you're looking for a unique women's watch or a cool men's watch this holiday season be sure to check out JORD Wood Watches.


JORD Wood Watches with Harlow and Thistle

JORD Wood Watches with Harlow and Thistle

JORD Wood Watches with Harlow and Thistle

JORD Wood Watches with Harlow and Thistle

This post was sponsored by JORD Wood Watches. Wooden Wristwatch
15:07:00 No comments
I love creating a fun unexpected give-away at the beginning of a party. It gets the kids engaged with the theme and the fun right off the bat. For my son's woodland themed party for his first birthday I decided to make felt crowns for the boys and floral crowns for the girls (obviously they could wear whichever they liked). To be honest neither was a huge hit - enh you win some, you lose some ;)


I made the floral crowns very easily by cutting a long floral vine and hot gluing it together. 


23:04:00 No comments
Of course I had to make some felt shorts to complete the birthday outfit. See felt crown DIY here. These shorts are adorable. I only wish I had made matching suspenders.
Use an existing pair of shorts or pants as a guide for the pattern (I probably shouldn't have used grey shorts here - I can see how this is could be confusing). Fold them in half and trace them onto some wax paper (I used newsprint here but I don’t recommend it because it can rub off on your fabric).
Cut the felt according to your pattern.
Sew a hem along the bottom of each leg. I made a wide hem here and purposefully used white thread to add character character to the shots.
Turn them inside-out and sew along the inseam and then sew the fly seam shut.
 
 
 Turn right-side-back (? ) Don't you love my highly technical sewing terms
 
Cut two small holes into the inside of the waist hem. Use a safety pin to thread some elastic through. Sew or tie the elastic together.
Work them out a bit and voila. Cute little shorts.
One thing I learned on this one is to add a bit more fabric to the bum-side (especially when your little one is still in a diaper).
20:49:00 No comments
Admittedly I go a bit over-the-top for first birthday's and this one is no different. For my second son's first birthday I decided on a woodland theme because it fits my little bear's personality perfectly.
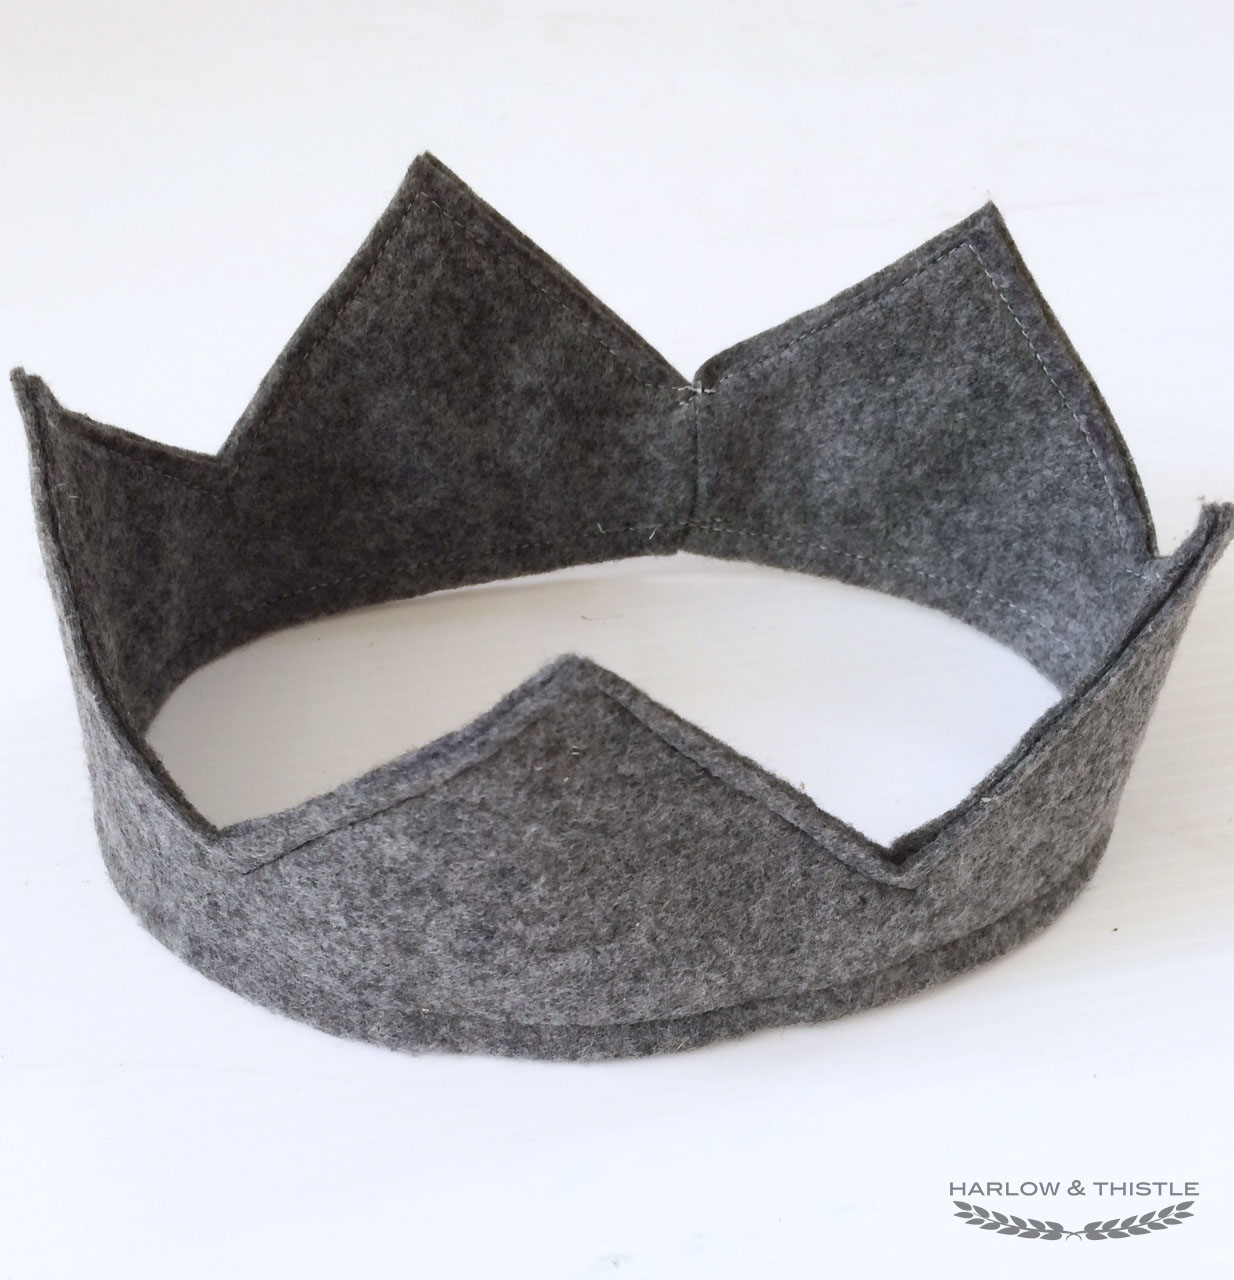
I needed a cute photo for the invitation which meant I needed to do a cake smash photoshoot which meant I needed a cute felt crown as a prop - that's my mind - here's the DIY Felt Crown for baby.

diy felt crown for baby 

diy felt crown for baby

 First I used the ribbon to measure my son's head circumference. 
You can also used a measuring tape.

diy felt crown for baby

 Then I cut a strip of felt to the length of the ribbon.


 I used newspaper to create a pattern. Make two horizontal lines and make dots 3inches apart along each of those lines. Then connect the dots in a zig zag from one line to the other.
Note, if I were to do this again I would have made the peaks closer together (perhaps 2inches).


 Fold the felt in half and cut the felt out according to the pattern.

Unfold the felt and sew the ends together.


 Then fold the crown back together and pin the peaks.


 Pull out this piece of your sewing machine.


 Sew the felt crown peaks together.


 Then sew the folded bottom as well.


 Voila. Felt shorts DIY can be found here.

diy felt crown for baby 

diy felt crown for baby


More first birthday DIY's to come.
11:01:00 No comments
Older Posts

Hello!


Hi! I'm Andrea, I'm a Designer, a momma and a hopeless DIY'er. My passion to achieve luxe for less led me to create Harlow & Thistle, a place to get home design inspiration and modern DIY home decorating ideas.

Email me to collaborate: harlowandthistle@gmail.com

SUBSCRIBE NEWSLETTER

Featured On

https://www.stylemepretty.com/living/2019/03/11/inside-harlow-thistles-mid-century-renovation-project/
 
https://houseandhome.com/video/blogger-harlow-thistle-budget-friendly-suburban-home/

https://www.styleathome.com/decorating/trends/article/the-hottest-design-trends-for-2017

Follow

Featured post

Modern Living Room Makeover

Popular Posts

  • DIY Gold Cake Stand
  • DIY Burlap Christmas Tree
  • DIY Holiday Ornament / Party Favour

Recent Posts

Created with by ThemeXpose