DIY Play Kitchen
PS - I don't have a farmhouse sink in my real kitchen but I've always wanted one : )


Here is the before and after.

You'll need some sort of used cabinet. I got this one from Goodwill for $7.

Here are the other things you'll need:

Note, there are a few things missing above (eg paint, gloss, jigsaw, drill, screws, mdf board etc) plus a few things that will be mentioned later in the post.

Here are some pics of my initial vision.


I used a ruler to draw the lines where I wanted to cut.
Of course I had to ask my dear old dad to cut them for me. Thanks dad : )

Here are the final cut pieces.
My mom snagged the grate inside the stove at a yardsale. Thanks mom :)

I used some L clamps to attach the pieces to the front of the stove.
I used some L clamps to attach the pieces to the front of the stove.

Next I painted the inside of the stove black and painted the frame silver.
(note, I later covered the frame and front of stove in aluminium contact paper).
(note, I later covered the frame and front of stove in aluminium contact paper).

I screwed some hinges onto the frame and then screwed the frame onto the front of the stove.

As mentioned at the top, there are a few extra things you'll need that I didn't know until after I started;
(i)
a LED push-light for inside the stove (ii) a campfire grill (used one
side for the top of the stove) (iii) stove knobs (you can get these off
Amazon) (iv) an HVAC register boot and foam tape (to edge the HVAC to avoid sharp sides - I covered the HVAC in aluminium contact paper as well).

Then I screwed the knobs on the stove. I left them a bit loose so my son could turn them.

I used the campfire grill for the top of the stove. I used washers and
screws to attach it, then painted the screws to blend in with the top.

For the farmhouse sink I painted the box white and sprayed a few coats of high gloss to make it look like ceramic.


Again I used L clamps to attach the box to the cabinet.

I covered the top with some marble contact paper.
I decided to run it down the side as well to cover up some imperfections.

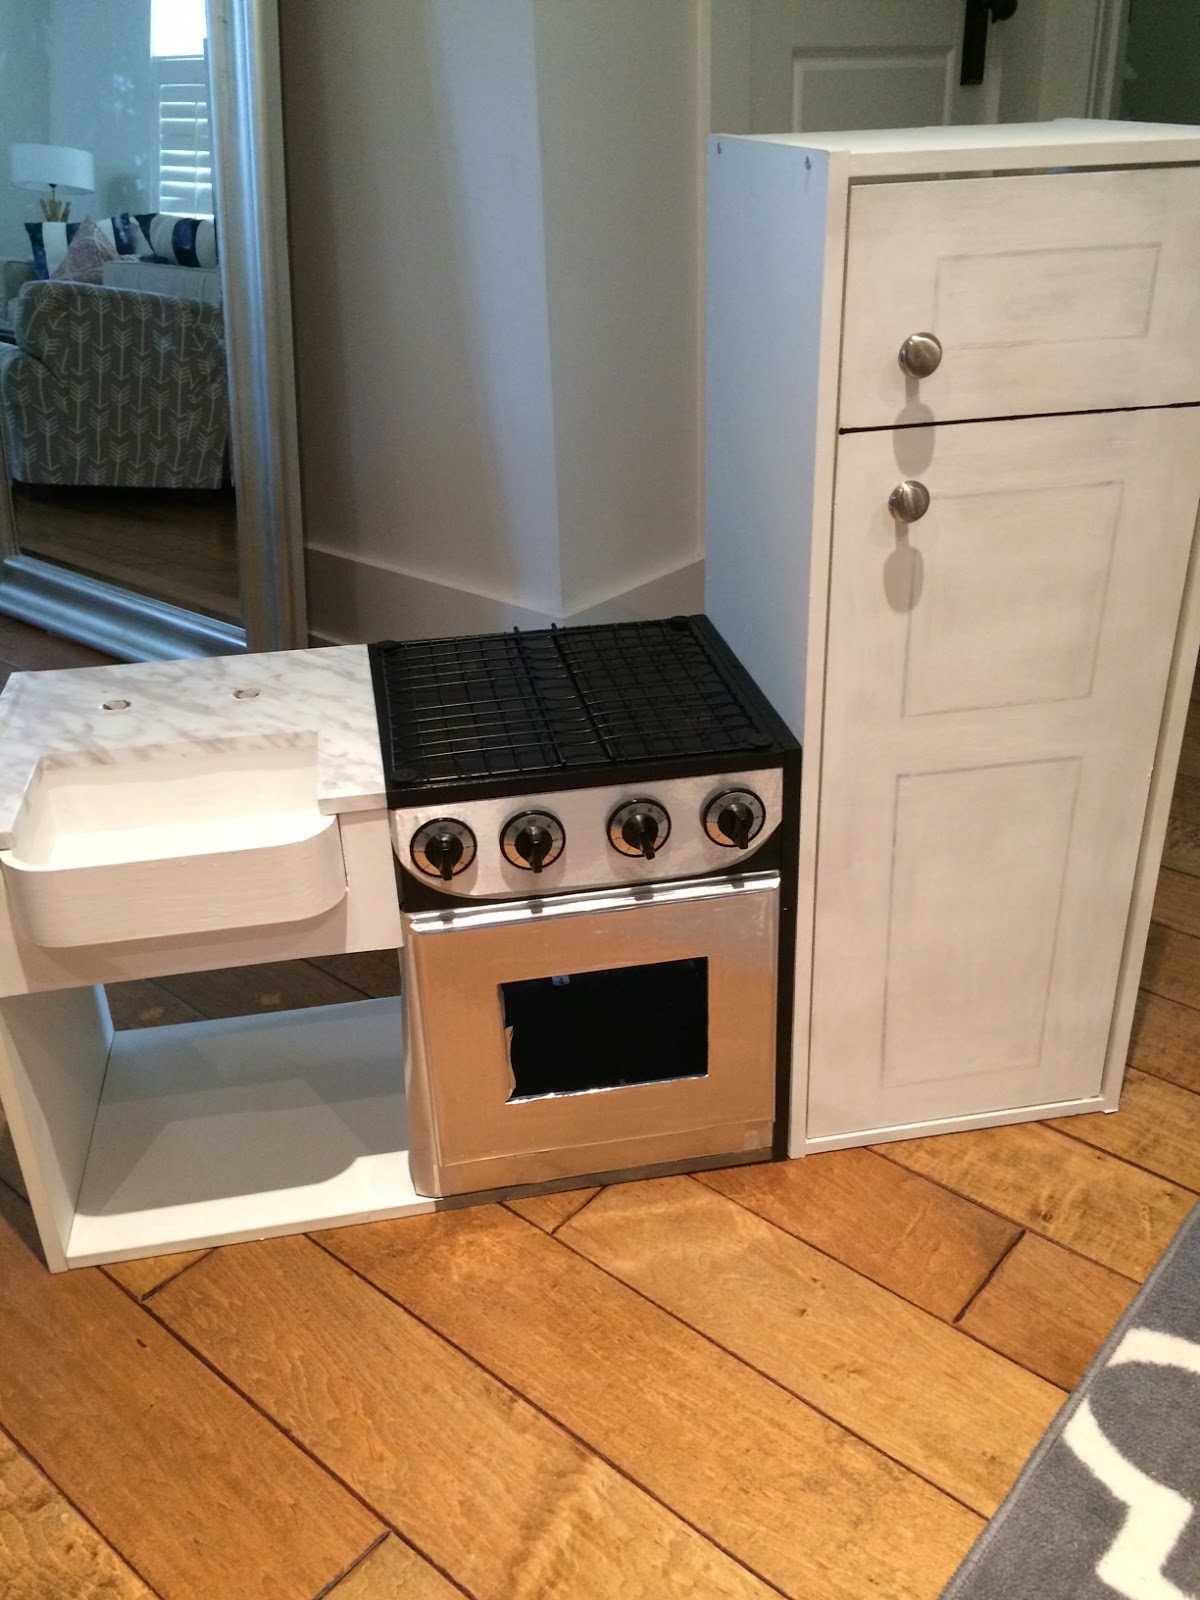
Here is the play kitchen half-way done.
You can see the grate and light on inside the stove.

For the backsplash I order these self-adhesive tiles from Home Depot but for a cheaper option you could just draw it with a sharpie.

Next I screwed the Hvac register boot onto the backsplash (be sure to wear safety goggles).
I also screwed on two little shelves above the sink and some hooks beside the stove.
I also screwed on two little shelves above the sink and some hooks beside the stove.

That's it. Here is the finished product. What do you think? I love it.


In the end, my son likes the kitchen but his hockey stick is never too far away, lol.

Shop this Post:


4 comments
I absolutely love this kitchen, so much better than a plastic one!!
ReplyDeleteI am the new guy
ReplyDeleteThis is brilliant
ReplyDeleteWonderful design and so fun. My grandson needs one...DIY in the making! Will be gathering items,maybe we'll shared the after pics!
ReplyDelete